Spring REST Docs는 Spring Boot 애플리케이션의 RESTful API 문서를 자동으로 생성해 주는 도구이다.
이 때 테스트 코드를 기반으로 API 문서를 생성하기 때문에 실제 API 동작과 일치하는 신뢰성 있는 문서를 제공할 수 있다.
기본적으로 AsciiDoc이라는 Markdown과 유사한 마크업 언어를 사용해서 문서를 작성한다.
↔ Swagger
Swagger라는 REST API를 문서화하고 테스트할 수 있는 도구가 존재하는데 이는 적용이 Spring REST Docs에 비해 쉽고, 콘솔에서 API를 호출하여 테스트할 수 있다는 장점이 존재한다.
하지만 프로덕션 코드에 API 문서화하는 코드가 의존하며 API 변경 시 문서에 누락될 수 있다는 단점이 존재한다.
따라서 이번 시간에는 Spring REST Docs를 적용하는 방법을 정리하려고 한다.
// 컨트롤러에 문서화를 위한 코드가 침투적
@GetMapping("/{postId}")
@Operation(summary = "게시물 조회", description = "게시물 ID를 이용하여 특정 게시물을 조회합니다.")
@ApiResponses({
    @ApiResponse(responseCode = "200", description = "성공적으로 조회됨"),
    @ApiResponse(responseCode = "404", description = "게시물을 찾을 수 없음"),
})
public String getPost(@PathVariable Long postId) {
    return "Post ID: " + postId;
}
Spring REST Docs Dependencies 설정
build.gradle에 아래와 같이 설정한다.
plugins {
    id 'java'
    id 'org.springframework.boot' version '3.3.8'
    id 'io.spring.dependency-management' version '1.1.7'
    id 'org.asciidoctor.jvm.convert' version '3.3.2' // (1)
}

...

configurations {
    compileOnly {
        extendsFrom annotationProcessor
    }
    asciidoctorExt // (2)
}

...

dependencies {
	...
    //Spring REST Docs (3)
    testImplementation 'org.springframework.restdocs:spring-restdocs-mockmvc'
    asciidoctorExt 'org.springframework.restdocs:spring-restdocs-asciidoctor'
}

...

ext { // (4)
    snippetsDir = file('build/generated-snippets')
}

test { // (5)
    outputs.dir snippetsDir
}

asciidoctor { // (6)
    inputs.dir snippetsDir
    configurations 'asciidoctorExt'

    sources {
        include("**/index.adoc")
    }
    baseDirFollowsSourceDir() // 다른 adoc 파일을 include 할 때 경로를 baseDir로 맞춘다.
    dependsOn test
}

//(7)
bootJar {
    dependsOn asciidoctor
    from("${asciidoctor.outputDir}") {
        into 'static/docs'
    }
}
(1) : Asciidoctor 플러그인을 추가한다. (Asciidoctor : Asciidoc 문법으로 작성한 파일을 html로 변환)
(2) : Asciidoctor 문서 생성을 위한 확장 구성을 정의. (dependencies의 asciidoctorExt로 라이브러리를 불러올 수 있도록 한다.)
(3) : MockMvc에 기반한 테스트를 통해 snippet(문서 조각)을 만들어내는데 필요한 의존성을 추가한다.
(4) : snippet들이 저장될 디렉토리를 지정한다. (여기서 경로는 build/generated-snippets)
(5) : 테스트가 끝난 결과물을 위에서 정한 디렉토리 snippetsDir로 설정한다.
(6) : test가 끝난 뒤 snippetsDir에서 입력(snippet)을 가져와 앞서 정의한 Asciidoctor configuration을 사용해서 index.adoc 파일을 처리하도록 지정한다. 이 때 index.adoc 파일에서 다른 adoc 파일을 include 하기 위해 경로를 baseDir로 설정한다.
(7) : Asciidoctor가 수행된 다음 생성된 API 문서를 bootJar를 실행한 뒤 실행 가능한 Jar 파일의 static/docs 하위에 복사한다.
(8) : 해당 Jar를 실행한 뒤 http://localhost:8080/docs/index.html에 접속하면 문서를 확인할 수 있다.
즉 gradle build 이후 테스트가 수행되면 결과물(snippet)이 snippetsDir 안에 존재하게 되고, 생성된 snippet을 받아서 index.adoc 파일을 구성하면 AsciiDoctor가 html 문서로 변환한 후 bootJar를 통해 실행 가능한 Jar 내부의 static/docs에 해당 html 파일이 복사된다.
JUnit5 Test 설정
1. snippet을 생성하기 위한 test/**/docs 하위에 RestDocsSupport 추상 클래스를 선언한다.
- @ExtendWith(RestDocumentationExtension.class) : Spring REST Docs 확장을 활성화하여, API 문서 생성을 위한 테스트 환경을 제공한다.
@ExtendWith(RestDocumentationExtension.class)
public abstract class RestDocsSupport {
	// ...
}
만약 스프링 애플리케이션을 테스트하려면 아래와 같이 해야한다.
@ExtendWith({RestDocumentationExtension.class, SpringExtension.class})
public abstract class RestDocsSupport {

}
그리고 내부에 MockMvc 테스트를 위한 설정을 한다.
이 때 MockMvc를 생성하는 방법에는 2가지가 있다.
- standaloneSetup: 단위 테스트하기 위한 테스트 환경 세팅
@ExtendWith(RestDocumentationExtension.class)
public abstract class RestDocsSupport {
    protected MockMvc mvc;

    @BeforeEach
    void setUp(RestDocumentationContextProvider provider) {
        this.mvc = MockMvcBuilders.standaloneSetup(initController())
                .apply(documentationConfiguration(provider))
                .build();
    }

}
- webAppContextSetup: 전체 스프링 환경을 포함한 완전한 테스트 환경 세팅
@ExtendWith({RestDocumentationExtension.class, SpringExtension.class})
public class RestDocsSupport {
    protected MockMvc mvc;

    @BeforeEach
    void setUp(WebApplicationContext webApplicationContext, RestDocumentationContextProvider provider) {
        this.mvc = MockMvcBuilders.webAppContextSetup(webApplicationContext)
                .apply(documentationConfiguration(provider))
                .build();
    }
}
지금까지 컨트롤러에 대한 단위 테스트를 작성하였으므로 이 글에서는 standaloneSetup을 이용해 테스트를 세팅하도록 하겠다.
최종 RestDocsSupport 클래스
현재 진행하는 프로젝트에서 Pageable을 처리하는 부분과 세션을 처리하는 LoginMemberArgumentResolver가 존재하는데 standaloneSetup의 경우 스프링 컨테이너가 생성되지 않으므로 resolver를 직접 생성해서 넣어주어야 한다.
그리고 해당 클래스를 상속받은 하위 클래스에서 테스트할 컨트롤러를 지정하도록 한다.
@ExtendWith({RestDocumentationExtension.class})
public abstract class RestDocsSupport {

    protected MockMvc mvc;
    protected ObjectMapper objectMapper = new ObjectMapper();
    protected MockHttpSession mockHttpSession;
    protected SessionMember sessionMember;

    @BeforeEach
    void setUp(RestDocumentationContextProvider provider) {
        sessionMember = createSessionMember();
        mockHttpSession = createMockHttpSession(sessionMember);

        LoginMemberArgumentResolver resolver = new LoginMemberArgumentResolver(mockHttpSession);
        PageableHandlerMethodArgumentResolver pageableResolver = new PageableHandlerMethodArgumentResolver();

        this.mvc = MockMvcBuilders.standaloneSetup(initController())
                .setCustomArgumentResolvers(resolver, pageableResolver)
                .apply(documentationConfiguration(provider))
                .build();
    }

    private SessionMember createSessionMember() {
        return new SessionMember(Member.builder()
                .id(1L)
                .name("name")
                .nickname("nickname")
                .email("xxx@xxx.com")
                .role(Role.USER)
                .status(DeletionStatus.NOT_DELETE)
                .build());
    }

    private MockHttpSession createMockHttpSession(SessionMember sessionMember) {
        MockHttpSession session = new MockHttpSession();
        session.setAttribute("member", sessionMember);
        return session;
    }

    protected abstract Object initController();
}
2. 위 클래스를 상속받아 컨트롤러 테스트를 진행한다. (test/**/docs/post)
단위 테스트로 진행 중이므로 service 역시 mock() 객체로 생성하고, 컨트롤러 역시 추상 메서드에서 생성, 반환하도록 한다.
public class PostControllerDocsTest extends RestDocsSupport {

    private static final Long TEST_TEAM_ID = 1L;
    private static final Long TEST_POST_ID = 1L;
    private static final String BASE_URL = "/api/teams/{teamId}/posts";
    private static final String TEST_TITLE = "테스트 제목";
    private static final String TEST_CONTENT = "테스트 내용";

    PostService postService = mock(PostService.class);

    @Override
    protected Object initController() {
        return new PostController(postService);
    }

	@Test
	@DisplayName("신규 게시글을 성공적으로 등록한다.")
	@WithMockUser(roles = "USER")
	void savePost() throws Exception {
		//given
		PostRequest.PostSaveDTO request = createPostSaveDto(TEST_TITLE, TEST_CONTENT);
		PostResponse.PostResponseDto responseDto = createPostResponseDto(TEST_POST_ID, TEST_TITLE, TEST_CONTENT);

		//when & then
		given(postService.save(eq(sessionMember.getId()), eq(TEST_TEAM_ID), any(PostServiceDTO.PostSaveServiceDTO.class)))
			.willReturn(responseDto);

		mvc.perform(post(BASE_URL, TEST_TEAM_ID)
				.contentType(MediaType.APPLICATION_JSON)
				.session(mockHttpSession)
				.content(objectMapper.writeValueAsString(request)))
			.andDo(print())
			.andExpectAll(
				status().isOk(),
				jsonPath("$.isSuccess").value(true),
				jsonPath("$.result.title").value(responseDto.getTitle()),
				jsonPath("$.result.content").value(responseDto.getContent())
			)
			.andDo(document("post-create",
				preprocessRequest(prettyPrint()),
				preprocessResponse(prettyPrint()),
				requestFields(
					fieldWithPath("title").type(JsonFieldType.STRING).description("게시글 제목"),
					fieldWithPath("content").type(JsonFieldType.STRING).description("게시글 내용")
				),
				responseFields(
					fieldWithPath("isSuccess").type(JsonFieldType.BOOLEAN).description("성공 여부"),
					fieldWithPath("code").type(JsonFieldType.STRING).description("응답 코드"),
					fieldWithPath("message").type(JsonFieldType.STRING).description("응답 메세지"),
					fieldWithPath("result.id").type(JsonFieldType.NUMBER).description("게시글 ID"),
					fieldWithPath("result.title").type(JsonFieldType.STRING).description("게시글 제목"),
					fieldWithPath("result.content").type(JsonFieldType.STRING).description("게시글 내용"),
					fieldWithPath("result.createdAt").type(JsonFieldType.STRING).description("게시글 작성 시간")
				)
			));
	}
    ...
}
여기서 기존 테스트 방식과 동일한데 API 문서를 자동으로 생성하기 위한 테스트 코드 (andDo(document(...)) 부분을 추가한다.
여기서 처음 파라미터로 들어가는 부분 (post-create)은 snippet을 생성하기 위한 폴더명을 지정한다.
위와 같이 설정하면 test 이후 snippet이 /build/{build.grade에서 지정한 snippetsDir}/post-create 하위에 snippet이 생성된다.
그 다음 문서에서 request, response 응답을 포맷팅하여 출력하기 위한 preprocess(prettyPrint()) 설정을 추가한다.
마지막으로 요청 DTO로 들어오는 필드명과 타입, 설명을 지정한다. 만약 해당 필드가 필수가 아니라면 .optional()을 추가하면 된다.
(만약 요청이 @RequestBody가 아니라 쿼리 파라미터라면 requestFields 대신 queryParameters를 사용한다.
.andDo(document("posts-find-all",
	preprocessRequest(prettyPrint()),
	preprocessResponse(prettyPrint()),
	queryParameters(
		parameterWithName("keyword").description("검색 키워드"),
		parameterWithName("type").description("검색 타입 (TITLE, CONTENT, TITLE_CONTENT, AUTHOR)")
	),
	responseFields(
		...
	)
));
응답 역시 실제로 반환되는 형태와 동일하게 지정한다.
이렇게 테스트에 통과하게 되면 아래와 같이 snippet이 생성된다

3. 생성된 snippets를 사용하기 위해 src/docs/asciidoc/*.adoc 소스 파일을 구현한다.
index.adoc 파일에서 문서 속성을 설정
ifndef::snippets[]
:snippets: ../../build/generated-snippets
endif::[]
= TeamNet Rest API 문서
:doctype: book
:icons: font
:source-highlighter: highlightjs
:toc: left
:toclevels: 2
:sectlinks:

[[Post-API]]
== Post API

include::api/post/post.adoc[]
그리고 Post API를 문서화하기 위한 post.adoc을 생성한다. (src/docs/asciidoc/api/post/post.adoc)
[[create-post]]
=== 게시글 등록

==== HTTP Request
include::{snippets}/post-create/http-request.adoc[]
include::{snippets}/post-create/request-body.adoc[]

==== HTTP Response
include::{snippets}/post-create/http-response.adoc[]
include::{snippets}/post-create/response-fields.adoc[]

...
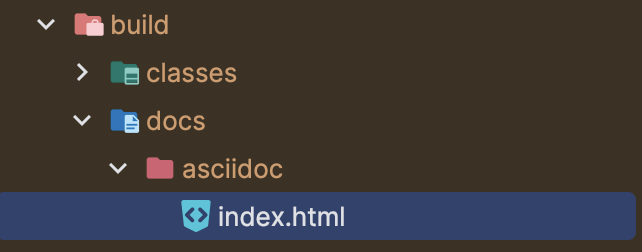
이후 build(asciidoctor)를 진행하면 build/docs/asciidoc 하위에 html 파일이 생성된다.
4. 만약 기본 snippet의 형태를 바꾸고 싶다면 사용자 지정 Snippet을 설정한다. (src/test/resources/org/springframework/restdocs/templates)
아래는 Request Fields, Response Fields에 대한 커스텀 Snippet의 예시이다.
==== Request Fields
|===
|Path|Type|Optional|Description

{{#fields}}

|{{#tableCellContent}}`+{{path}}+`{{/tableCellContent}}
|{{#tableCellContent}}`+{{type}}+`{{/tableCellContent}}
|{{#tableCellContent}}{{#optional}}O{{/optional}}{{/tableCellContent}}
|{{#tableCellContent}}{{description}}{{/tableCellContent}}

{{/fields}}

|===
==== Response Fields
|===
|Path|Type|Optional|Description
{{#fields}}
|{{#tableCellContent}}`+{{path}}+`{{/tableCellContent}}
|{{#tableCellContent}}`+{{type}}+`{{/tableCellContent}}
|{{#tableCellContent}}{{#optional}}O{{/optional}}{{/tableCellContent}}
|{{#tableCellContent}}{{description}}{{/tableCellContent}}
{{/fields}}
|===
5. 빌드 후 생성된 jar 파일을 실행한 뒤 http://localhost:8080/docs/index.html에서 생성된 문서를 확인한다.


참고
Spring REST Docs
Document RESTful services by combining hand-written documentation with auto-generated snippets produced with Spring MVC Test or WebTestClient.
docs.spring.io
'Test' 카테고리의 다른 글
| Error creating bean with name 'jpaAuditingHandler' (0) | 2025.01.02 |
|---|---|
| [Test] Spring-Security 도입 후 테스트 (0) | 2025.01.02 |
| [Test] 서비스 계층 테스트 (0) | 2024.12.30 |
| [Test] 컨트롤러 테스트 (0) | 2024.12.30 |
| [Test] Mockito와 단위 테스트 개념 (0) | 2024.12.30 |